From the archive
WordPress Lockdown! Part 1 – Renaming the admin account
· Matt Stratton
WordPress is one of the most popular blogging platforms available today. However, it’s very popularity can work against it – due to the fact that many people install WordPress but don’t know how to properly lock it down, it’s a prime target for hackers who want to exploit it. Making your WordPress blog nice and secure requires a minimal amount of effort – but it will pay off when you don’t find yourself in the unenviable position of having your entire blog wiped out by some jerk who thinks it’s hilarious to mess with other people’s websites. This post is Part 1, which focuses on the Admin account in WordPress (the keys to the kingdom). Part 2 will discuss methods of protecting your wp-admin directory (which is the door to the kingdom, to continue the metaphor).
Note – this tip is for “self-hosted” WordPress installations. For purposes of this discussion, “self-hosted” means “not on wordpress.com”. It doesn’t mean you yourself own a server, or host your blog out of a computer connected to your cable modem in your basement. Want to know if you’re self-hosted? Here’s an easy way to find out: if you have the rights to install plugins into your WordPress, you’re self-hosted)
Renaming the admin account
By default, when WordPress is installed, an administrative account called “admin” is created. This account is a prime target for hackers, since they know that every WordPress blog has a powerful account with the name “admin”. They can launch a password-guessing tool against your blog with the user “admin”, and eventually, they might be able to get through. Obviously, we want to get rid of this account. Here’s the steps to follow:
Make sure you’re not posting as “admin”
You should have created a second account which you use for all your posting. If you HAVE been posting as admin, please slap yourself on the wrist. Bad blogger! No cookie! Luckily, this is easy to fix – create a new user account which you will use for your posting. You can go ahead and give it the role of “administrator” if you’d like. Be advised that email addresses must be unique inside a WordPress installation, so if you want to use the email address you’ve already assigned to “admin”, you’ll need to change Admin’s email address first.
Super secure tip – if you want to be REALLY tight, only give your new account the role of Editor. That way if a hacker figures out your username, they won’t have unfettered access to your entire blog. This might be considered an “overkill” step, as Editors still have the right to delete posts, but they won’t be able to install plugins that might be sneaky backdoors into your blog. When you want to do admin-type things, you’ll log in with the new admin account we’re creating in the next step.
Create a new admin account
WordPress won’t let you rename an existing account, but we can accomplish this in a roundabout way. Create a new account that will be considered your “backdoor” or “break glass” admin for your blog. I suggest giving it a name that you will remember, but not something like “root” or “administrator”. It’s okay to have the word “admin” IN the login name, however. For example, if your blog is called “Awesome Blog 2000”, you might call your admin account “abadmin”.
Give that account the “administrator” role, and set a REALLY strong password for it. It should be 14 characters long, and include letters, numbers, symbols, and mixed case. I recommend using the Strong Password Generator website to create this password. Don’t worry about remembering it – you’re going to store this password in a safe place, but not have to remember it in your head.
Now, go into Authors & Users under “Users” in your WordPress settings, and delete the account called “admin”. If you’ve been posting as this user, when you delete it, WordPress will ask you who to assign those posts to – just pick your own personal account for this. No fuss, no muss.
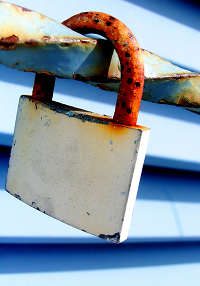
Lock image from Flickr user Darwin Bell
![Reblog this post [with Zemanta]](https://img.zemanta.com/reblog_c.png?x-id=3aab49a5-e52a-45f2-8cd8-abf99f53cca6)