How to create a custom Identity Plate in Lightroom
Posted on Sunday, Oct 11, 2009Last week, I posted a picture showing off my new dual-screen setup on my home PC. My good pal Marcelo was not impressed with my double-monitor goodness, but he WAS curious as to how I set up a custom “logo” on my Lightroom screen. It’s super easy – and here’s how.
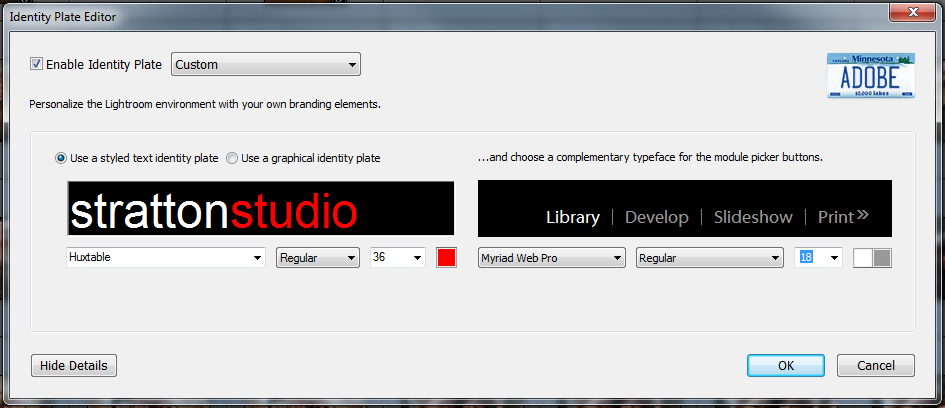
First step, when you fire up Lightroom, go to the Edit menu and select Identity Plate Setup (it’s the last option in the menu. That will take you to this screen:
This is the “control panel” by which you can totally customize how Lightroom looks, with your own branding. All that I did was pick “Use a styled text identity plate”, and type in the name that I wanted – and then style the text using standard font editing options. If you want, you could create a complete graphic for your identity plate, and then drag it in (once you picked “Use a graphical identity plate”).
It’s THAT simple. Seriously. So what’s keeping you from doing it? Why give Adobe all the press in your Lightroom installation?
