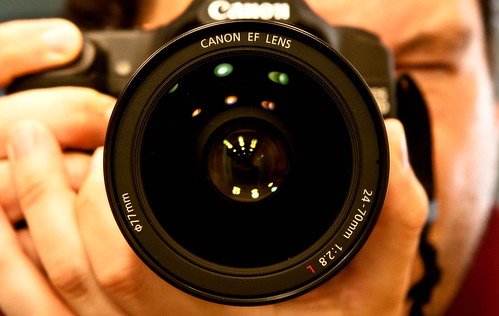
From the archive
Looking Sharp – tips & tricks for getting great photos with your dSLR
· Matt Stratton
 Making the transition from a point-and-shoot camera to a dSLR can be tricky. It’s kind of like switching from automatic transmission to a stick – sure, you can get better performance out of a manual transmission, but for a while, you drive worse than you did with the automatic*.
I’ve been helping my friend Ari at Curiousillusion (and my friend Tracy, who doesn’t have a blog) with some tips and tricks about dSLR shooting, and decided it was prudent to concatenate all of these tips into one blog post. Hopefully they’ll be useful to you as well.
Get educated
It’s going to be tempting to try to “figure it out” by just playing with your camera. But this is a recipe for aggravation. I recommend picking up a few essential books, reading them, and then rocking out. Here’s the “must-read” books for any new dSLR photographer:
Understanding Exposure by Bryan Peterson – this is not a dSLR specific book, but it delves deeply into the relationship between aperture/shutterspeed/ISO, which is key to understanding, well, exposure. This book teaches you WHY to do certain things to get the photos you way.
The Digital Photography Book Vol. 1 by Scott Kelby – much less about theory than Peterson’s book. This is kind of like a “photography cookbook”. It’s written in the manner of “Want this photo? Then do THIS.”
Magic Lantern guides – get the one that is specific to your model of camera. They replace/supplement the manual that your camera came with. If the Peterson book tells you the WHY, this book tells you HOW to implement that on your specific camera.
It’s all about the aperture, baby
Your new camera has some pretty cool “automatic” modes. One of them is “full auto”. Plus it probably has all of those “Portrait” or “Landscape” modes. My advice? Forget all of them. Shoot in the manual modes. That doesn’t mean “full” manual (aka M mode on Canon). I’m talking about Av or Tv mode (don’t know what Nikon calls theirs). What’s the point in getting a camera like yours if you’re just going to leave it on auto? That’s like buying a Corvette with an automatic transmission. Sure, it’s possible – but what’s the point?
90% of the time you are going to want to shoot in Aperture Priority mode (this is Av mode on Canon). In this mode, you set the aperture of the lens, and the camera’s built-in light meter will determine what shutter speed to set to properly expose for that aperture. It might not be the exposure you’re looking for, but shooting in full Manual mode (where you set the aperture AND the shutter speed) is a little more advanced than we want to worry about today.
Remember – the smaller the f/stop number, the wider the aperture. The wider the aperture, the more light is let in, so the faster the shutter speed will be set. The faster the shutter, the less blurry the photo.
Macro-tastic
You might be used to using the “macro” mode of your point-and-shoot, which lets you get super close to objects to take cool shots of them. You can buy a macro lens for your new camera, but you can also fake your way through macro shots with your kit gear. It is going to sound a little counter-intuitive, but trust me on this. Here’s how to get a macro-style shot using the kit lens that came with your body.
-
Aperture priority mode
-
Rack your lens all the way (that means zoom in as close as the lens will zoom)
-
Set the aperture to the lowest number it will take (you do this second, as unless you’ve got super fancy glass, the maximum aperture for your lens will shift from each end of the telephoto)
-
Move YOURSELF and the camera the distance you want to compose the shot
-
Breathe out and shoot
Why you want to be tacky
In photography circles, a super crisp, perfectly focused image is referred to as being “tack-sharp”…as in, sharp as a tack (Scott Kelby has lots of jokes about where “tack sharp” came from, including a made-up acronym, but you’ll have to read his book to get those). Ultimately, we’re ALL on a crusade for the tack-sharpiest photos ever. There are many ways to achieve this, but we’ll cover just a few here.
Don’t recompose
A technique a lot of people like to do with their point-and-shoot is to center the subject in the viewfinder, press the shutter halfway down to focus on that subject, and then recompose the photo so the subject is not centered (because as we all know, centered subjects suck). This is a dangerous game to play when you have a narrow focal plane (which you’ll get with a wide aperture and long telephoto). The focal plane is so narrow that just the slightest move will knock your subject right out of it. Better to switch the focus POINTS in your viewfinder. This is done differently on every camera, but you can switch it so that instead of it autofocusing on the center point, it will autofocus on a different point in the frame. It will feel WAY awkward to do this at first, but after about 20 exposures you’ll get the hang of it.
Fire off the bursts
I recommend the Kelby method of “burst mode” – set your camera shutter to shoot in bursts when you hold it down. I usually fire off between 3-6 frames per shot. That greatly increases my chance for a tack-sharp photo. Try it – you might like it. It gives you additional headaches in post-processing (you have to go through 3-6 frames for each shot to pick which one is best) but I live by this method.
Stability is king
You’re going to hate this tip, but if you want to be really sharp, you’ve got to prevent as much camera movement as possible. First way to do this – put the camera on a tripod. If you can’t use a tripod, a monopod is usually a good solution as well. Barring that, figure out how to hold your camera as steady as possible – for starters, pull your hands and arms in as close to your body as you can. Lean against something if possible.
Next step – use a remote to fire of the shutter. Your finger stabbing down on the shutter button is going to introduce shake. A remote helps with that. If you don’t have a remote, putting the camera on a timer accomplishes a similar thing.
Check your WHIMS
Scott Kelby has a great “start-up” ritual which I love, called WHIMS. It’s an acronym to help you remember the things to check before shooting. Here’s what they are:
White balance – Make sure you have the proper white balance for the shooting scenario.
Highlights – Set the highlight clipping warning (aka “blinkies”). This is the feature where on the LCD it will blink areas that are blown out.
ISO – This is a killer if you miss it. All of us have had the experience of shooting in low-light the night before, and then the next day shooting in daylight but our ISO is still set to 3200. And this is the kind of mistake you WON’T see on the camera’s LCD, but you’ll see it when you look at the photo on the computer. Critical!
Mode – What shooting mode are you in? Aperture priority? Program mode?
Size – Are you in RAW? Full sized JPEG? Nothing worse than shooting a ton of great stuff, only to find out you did it at low resolution.
Final notes
Don’t get frustrated! This is NOT an easy skill to master. Don’t be upset if you can’t immediately create amazing photos within the first week of acquiring your new gear. It takes a LOT of practice to get there – and in some ways, you are going to feel like you are not getting as good of results as you did with your previous camera (I know that for the first week or so of using my 40D I actually thought I shot worse than I did with my Rebel). But push through, keep working, and keep learning. You can do it!
* – Unless you are Totally Heather. Then you move to manual transmission with nary a blink.
Have any other tips and tricks you’ve learned that you’d like to share with new dSLR owners? Have a question about using your new dSLR? Share them in the comments!